I've had small setbacks. I've had things get sick or die where I can't figure out why, and that really triggers me. But today, I argued with myself all day to get the hell out there and do something. I finally went and thought, hey, I'll just weed-whack the places where I'm going to slash-mulch. So I did. OK. I was still feeling overwhelmed, so I thought, hey, go see the surprise recovery of the hazelnut! That success should help cheer you up. It looked like this 10 days ago (May 18, 2020):
I expected even bigger and more leaves. Well, the bunnies or something got to it. Bunnies live in the evergreen stand that this patch is in. Here's how it looks today.
I got so angry. I'm so mad still. Mother fuckers. OMG, I'm SO not in the right mind. I should've seen this as a solution brainstorming moment. But no. I wanna cook that bunny.
So, I thought, geeze, just keep looking around. I've had successes. A few setbacks is normal. I'm still a beginner.
So I looked at the rest of the garden. Yay! One of my Jerusalem artichoke patches survived the endless slug onslaughts.
But the other patch? Lost 6 of them to those choosy bastards. Only 3 small ones are left. Luckily I got some from a woman on the Homesteading Women's group. Need to put them in. They're already growing shoots.
The sunflowers are NOT doing well, though 2 look like they're gaining the upper hand over the raw manure.
My peppers... my babied peppers are hanging in there, but the ones I didn't cover in a polytunnel GOT EATEN! AAARRGRGGHH!!! Why the fuck did I bother?!?!?
FYI, I'm on my second overflowing bowl of ice cream.
LOOK! Look, I have proof that the slugs WILL eat weeds.
BUT THEY DON'T when there's Jerusalem artichoke around or or... or MY BRUSSELS SPROUTS, YOU MOTHER FUCKERS!
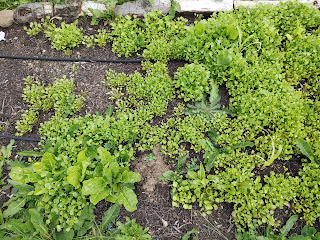
The collards and kohlrabi are so far doing ok. In fact they're finally over their transplant shock and are starting to grow.
Speaking of transplant shock, why is that?!?! Temperature? Or, ... they went from growing next to their buddies, touching roots, not lonely, and then BAM! They're separated by a lot of soil. I've heard both Charles Dowding and the woman from Dirt Patch Heaven say they like to be near each other. I always felt it was a waste to over-sow, and then have to thin. But you could always eat the thinnings, and if over-sowing makes them happier, then that's reason enough to do it.
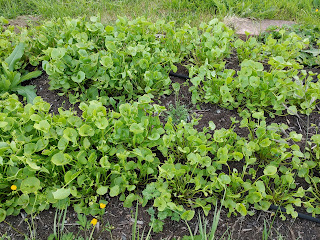
But I digress. The slugs seem to be leaving the miner's lettuce alone. Although I did pull 3 of them off some leaves.
Look at my poor perennial kale! I pulled 3 slugs off of 2 plants. They are not happy, and they've been out there longer than most plants show transplant shock. :(
They looked like this when they were in pots.
Now they're bolting from stress and panic. :(
Something has removed or eaten or rotted all of the buds off of my strawberries.
Maybe it's this little shithead.
I can't bring myself to torture them. The best slug repellent is to spear one with a toothpick and leave it writhing in pain near the plants you care about. Other slugs run! But I can't do that. As much as I LOATHE them. :(
My roses. Poor things. Need to look this up.
I finally went to my potatoes. My pride and joy! The plants that are doing amazingly well for god knows what reason. And then I saw this on 3 of them (the same potato--the other potatoes are fine).
I was like, WOW! How many slaps in the face am I gonna get.
Oh, I found this article about roses, https://www.thespruce.com/black-spot-on-roses-4125530:
Black spot is a fungal disease (Diplocarpon rosae) that affects roses. The fungus develops as black spots on the leaves, which eventually causes the leaves to turn yellow and drop off. Besides looking unsightly, it can seriously weaken the rose plant. Black spot thrives during hot, humid, or rainy summers and hot days with cool, damp nights.Hot days, cool damp nights? Check! But the spots didn't show up until after I sprayed with my home-propagated EM-1. I wonder....
Affected leaves often fall off the plants, and if left unchecked, the entire plant can defoliate.Oh! That's happened 2 years in a row. Just not this early.
Black spot is easier to prevent than to cure. Existing spores can remain in the soil and overwinter on leaves and stems, waiting for favorable conditions. The spores make contact with the rose by splashing onto it in drops of water.Hmm. We've had a lot of rain. Or, maybe I spread the spores around by spraying it.
Remove any infected leaves and always do a thorough cleanup each fall. Remove and dispose of any remaining leaves when you do your dormant pruning in late winter/early spring. Spores can remain on leaves and stems and can reinfect whenever conditions are favorable.Oh. I'm supposed to prune them? I didn't know that. We inherited these roses with the house. Uhm... you know, I was planning on incorporating them into the thorny fedge, but now... it's probably best if I just dispose of them all. If I do get roses, I'd rather they be less laborious. I'll have enough work to do. Well, I'll try a neem oil application and see if that helps. I wonder if you can see the fungus under the microscope.
Now, the potatoes. From https://www.canr.msu.edu/news/brown_leaf_spot_in_potatoes_plan_for_this_early_blight_look_alike_in_2013:
The fungus that causes brown leaf spot, Alternaria alternata, is closely related to early blight (Alternaria solani). Like early blight, brown leaf spot overwinters as spores and mycelia on the infected tissue of various Solanaceous hosts. Warmer temperatures in spring trigger fruiting and the release of spores from both fungi, which are moved by wind and water onto potato plants. When moisture is available, the spores germinate and penetrate potato tissue, often through existing wounds. Initial infections of the two pathogens create similar symptoms: small, dark spots on lower leaves.
Great. Another fungus.
However, the foliar lesions caused by brown leaf spot never develop the dark concentric rings characteristic of early blight. They coalesce across large veins until whole leaves turn brown and hang from the plant. The tuber symptoms of brown leaf spot are commonly referred to as black pit, appearing as small black holes in the tuber surface. Brown leaf spot can also result in skin patches similar to those caused by early blight, most often observed after washing.
I'm not messing with this. I'm gonna yank these 3 to save the other 20.
Sigh. Now, what to do about slugs? Someone told me to put a ring of coffee grounds around susceptible plants. I can do that. I'm also gonna harvest all of my blackberry canes and try to dry them straight. Those not straight, I'll chop up. I'll make little fences and minefields out of them.
Rabbits... well, Dirt Patch Heaven lady battles rodents and bunnies. I'll have to re-watch her videos. I know she uses cages, bird netting, fleece, and gallon milk jugs that are pinned down.
I'm done for tonight. So demoralizing. :(
But I will say that the researching and troubleshooting lifted me up again. You know, when I first embarked on this project, and before I even moved the first wood round into place in the terraces, I made this huge plan. I didn't follow it. Now I realize I should have. Until I find the notebook that has the list, I'll try to recreate it here:
- Make a mapped plan. Done. I need to mark places for specific plants, storage of delivered material, and future animal housing, etc.
- Clear driveable paths (so you can bring in stuff). Not quite done. Kind of important.
- Start building fertility in the soil. This includes regular inoculations, and composting. I've got my 3 pits, but they're not full of anything.
- Start propagating the plants you want in a nursery bed or in pots. Plants for these areas, listed in priority:
- The plants you're moving out of the drivable paths.
- The pleachable plants for the fedge.
- The trees for the food forest.
- The supporting plants for the fedge and the food forest.
- Perennials that will go all around.
- Blah blah blah.
Notice that building fertility came before anything else. Even though I was a raw beginner, that was a really good rule I should've followed. Look what lack of fertility has done for me? Struggling plants, diseased plants, weed overgrowth. I think I need a new plan:
- Finish mapped plan, including things I need to add like animal housing and storage of materials.
- Finish planting my trees and starts.
- Clear the drivable paths and find out what to do to make the soil stable.
- Start building the fertility in the soil. If you can add fungi to the soil, great, because that'll prevent weeds. If not, maybe cover the soil in black plastic or wool carpet to keep the weeds from growing.
- Start determining and collecting my short-growing perennial cover crop seeds. Prep the places where you'll sow it in January.
- Build the physical structure of the garden. That means finishing the terraces complete with pretty retaining wall and embedded hardware for cold frames, trellises, and hoops. Identify the big jobs and attack them one at a time, and see them through til they're done.
- Schedule the things I need to do. Ie, look up when to transplant the daisies and shrubs out of the drivable path, and put it on the calendar.
- Once fertility is there, begin bringing in the perennial plants, and start your annuals.
Update 6/1/2020, 4 days later:
I didn't go out for 4 days, I had been so bummed. Today I bit the bullet after the sun's intensity diminished, and went out to plant my pumpkins which were getting really big on the covered porch.
After planting about half of them, I turned around and saw this:
I felt so ashamed for being so pissed off on the 28th. What a bounty!! So delicious. I think I ate 20. There were about 100 though.
And then I saw carrots that weren't there 4 days ago:
I also cruised by the "other apple tree", which I forgot wasn't an apple tree. It's got little yellow oblong fruits growing. "OH!" I forgot it was a plum. OMG, I can't believe it. There are apples, pears, and plums. Also raspberries on the healthier raspberry bush.
I'm kinda ashamed of myself. I gave a little lovely ... chat (I won't say prayer) to everything to thank it all. :)


